Tominer Relay Program User Guide
This tutorial will detail the deployment and configuration steps of the Tominer relay program, suitable for novice users to get started quickly.
It is recommended to use a cloud server in Hong Kong, and choose Ubuntu as the system for optimal compatibility.
1. Cloud Server Deployment
It is recommended to use a cloud server for deployment. The following is the installation tutorial for Alibaba Cloud; operations for other cloud service providers are similar.
1.1 Select Appropriate Server Configuration
- For fewer than 500 users: Lightweight application server, 2 cores 1G memory or higher, approximately 34 yuan/month
- For 500~3000 users: ECS server, 2 cores 2G or higher configuration, it is recommended to charge by traffic
- For more than 3000 users: Deploy on multiple servers and set up load balancing
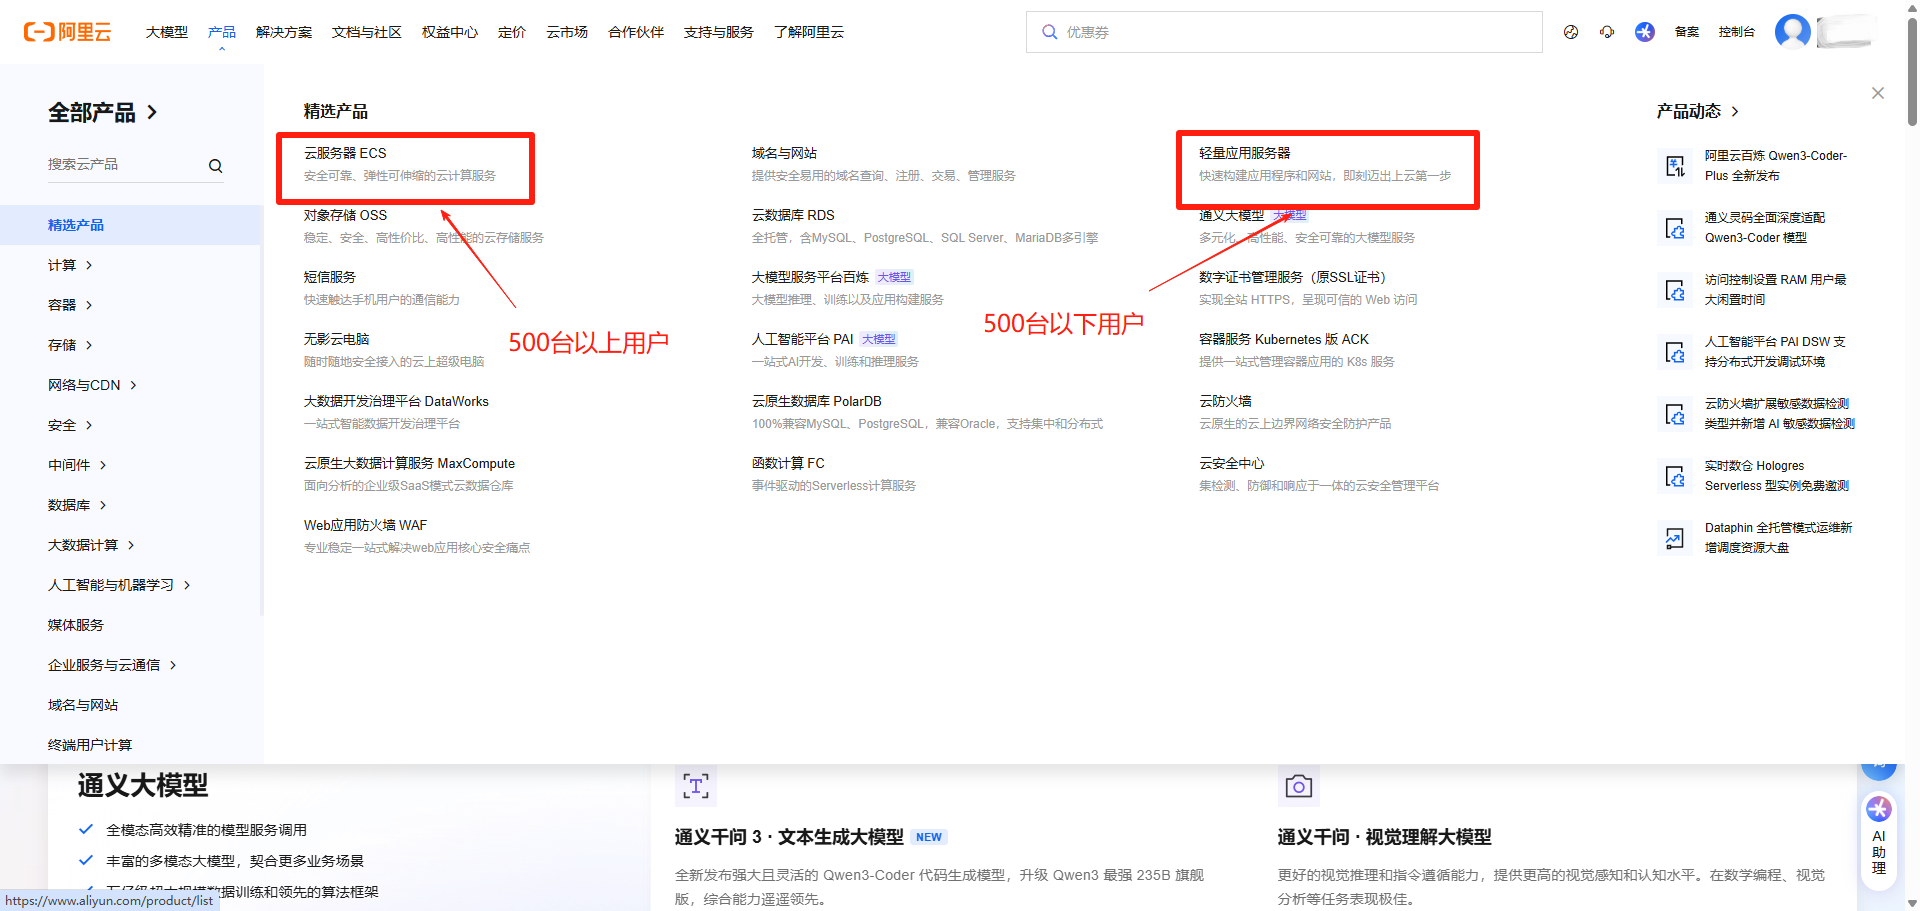
Alibaba Cloud Server Configuration Selection Interface
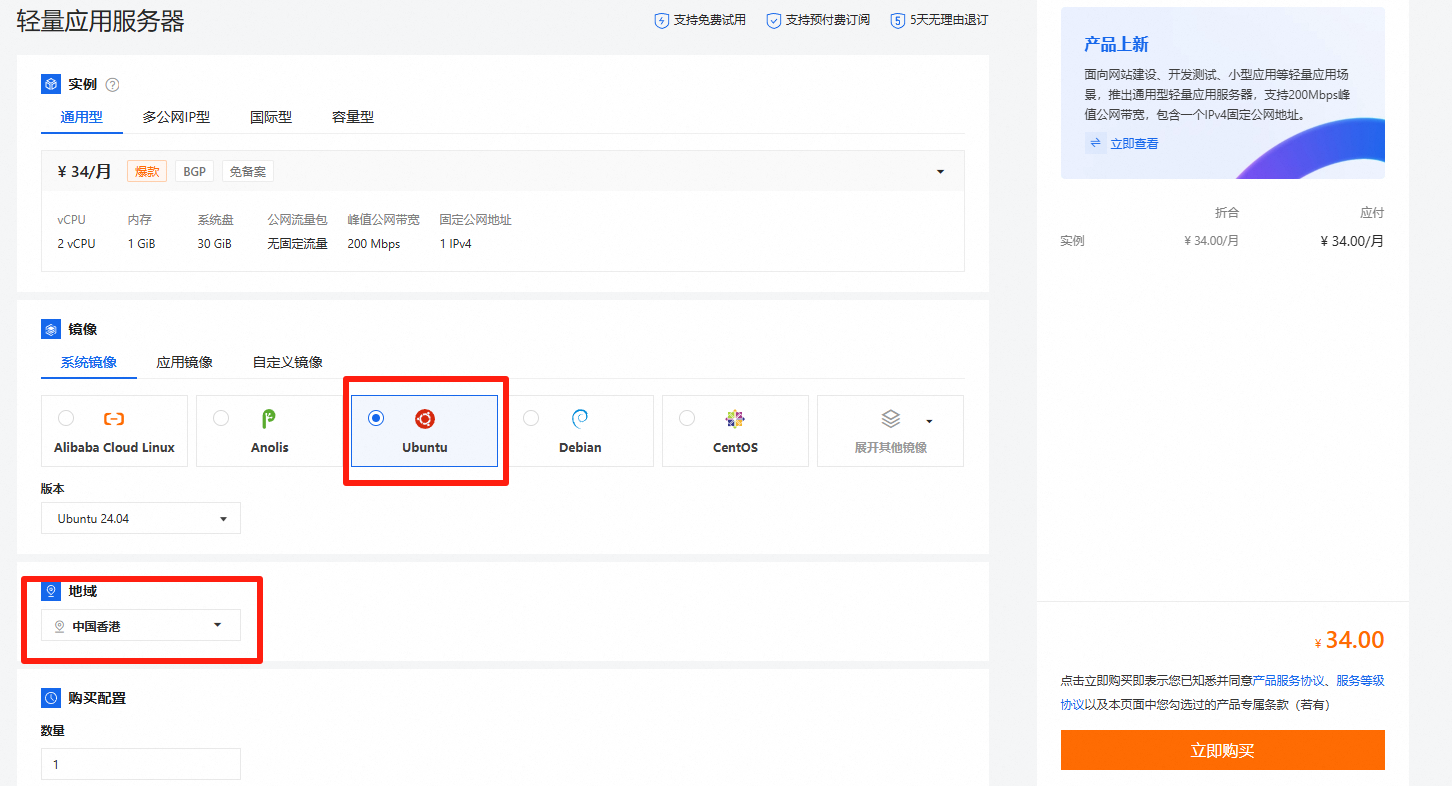
Alibaba Cloud Server Configuration Selection Interface
1.2 Configure Firewall
After purchase, you need to open server ports:
- For lightweight application server users: Find firewall settings in "Instance ID"
- For ECS users: Open the firewall in "Security Rules"
- Open ports 23/65535 (Note: Port 22 needs to be closed after installation is complete)
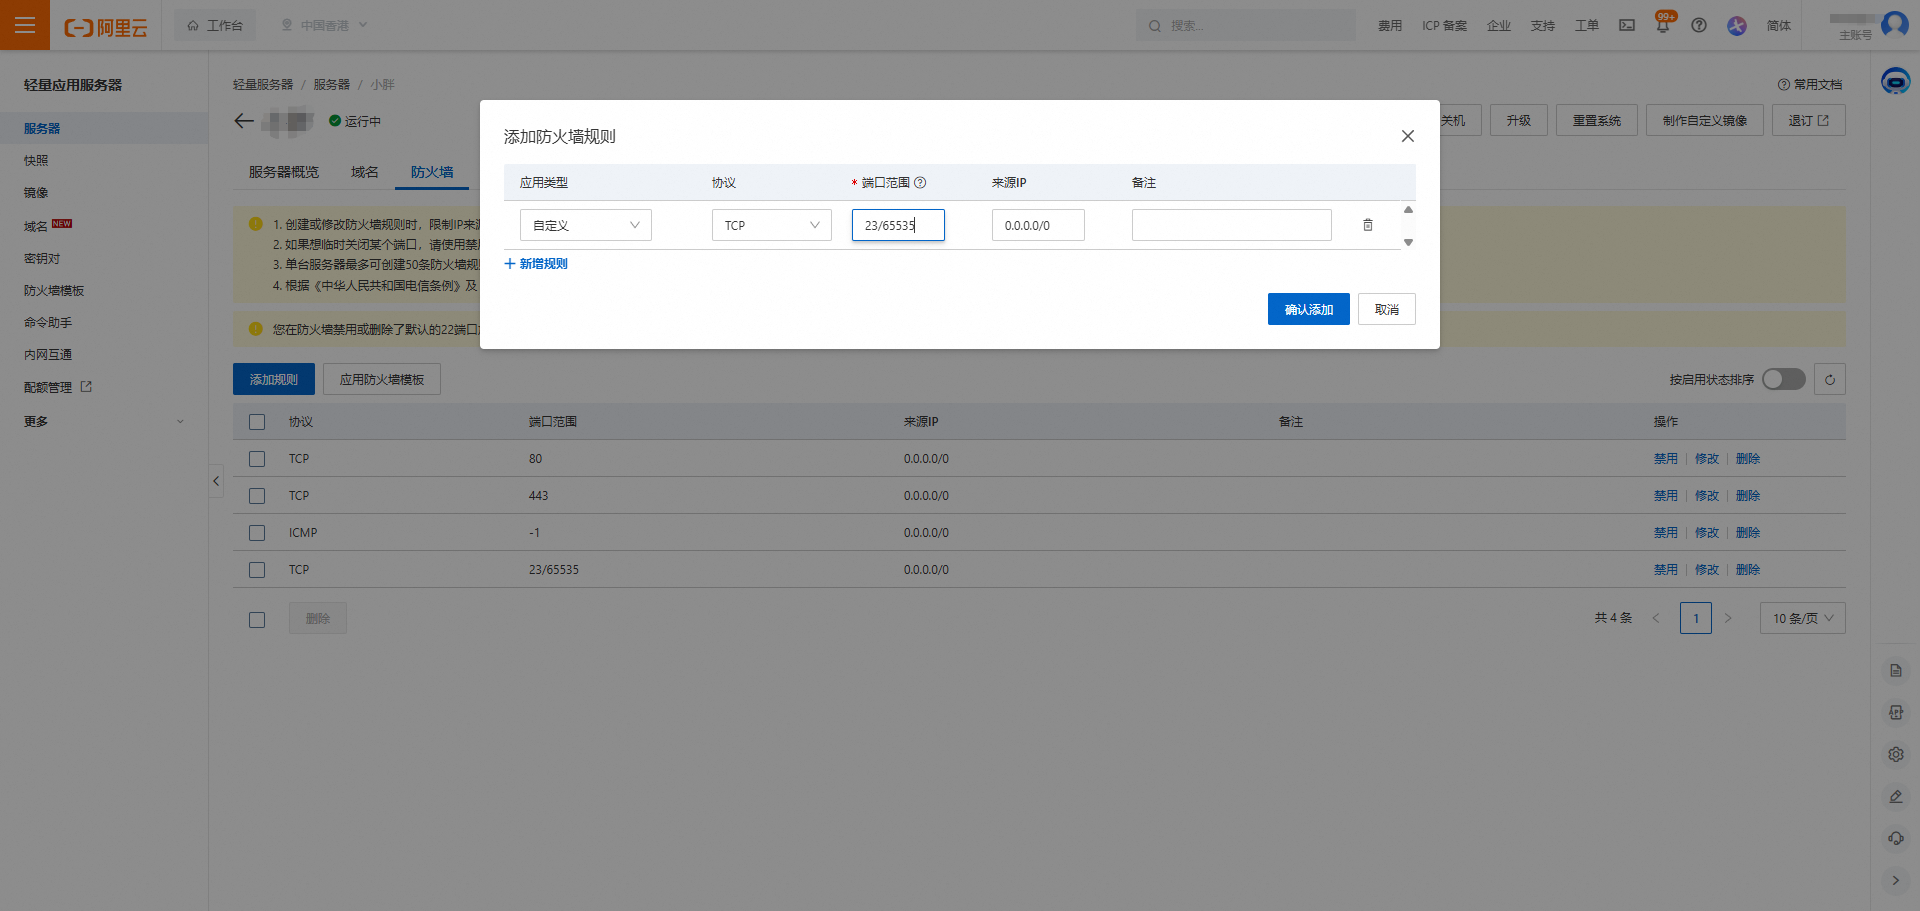
Firewall Rule Configuration Interface
1.3 Modify Server Password
Click to modify the server password, you can choose online modification or offline modification. The password must meet:
Password requirements: uppercase letters + lowercase letters + numbers + special characters
1.4 Remote Connection to Server
Click remote connection, enter the set server management password to enter the server management interface.
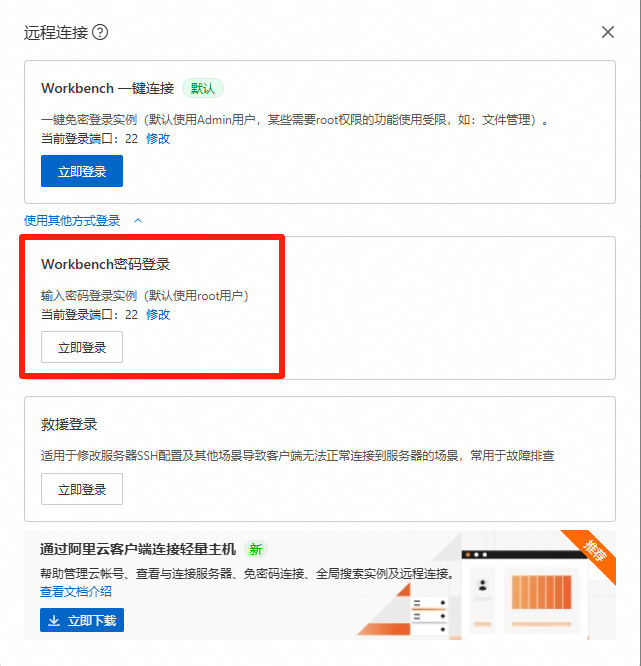
Server Remote Connection Interface
1.5 Install Tominer Relay Program
Enter the following installation command in the server management interface and press Enter:
Enter numbers as prompted to install. After completion, the background access address and default account password will be displayed.
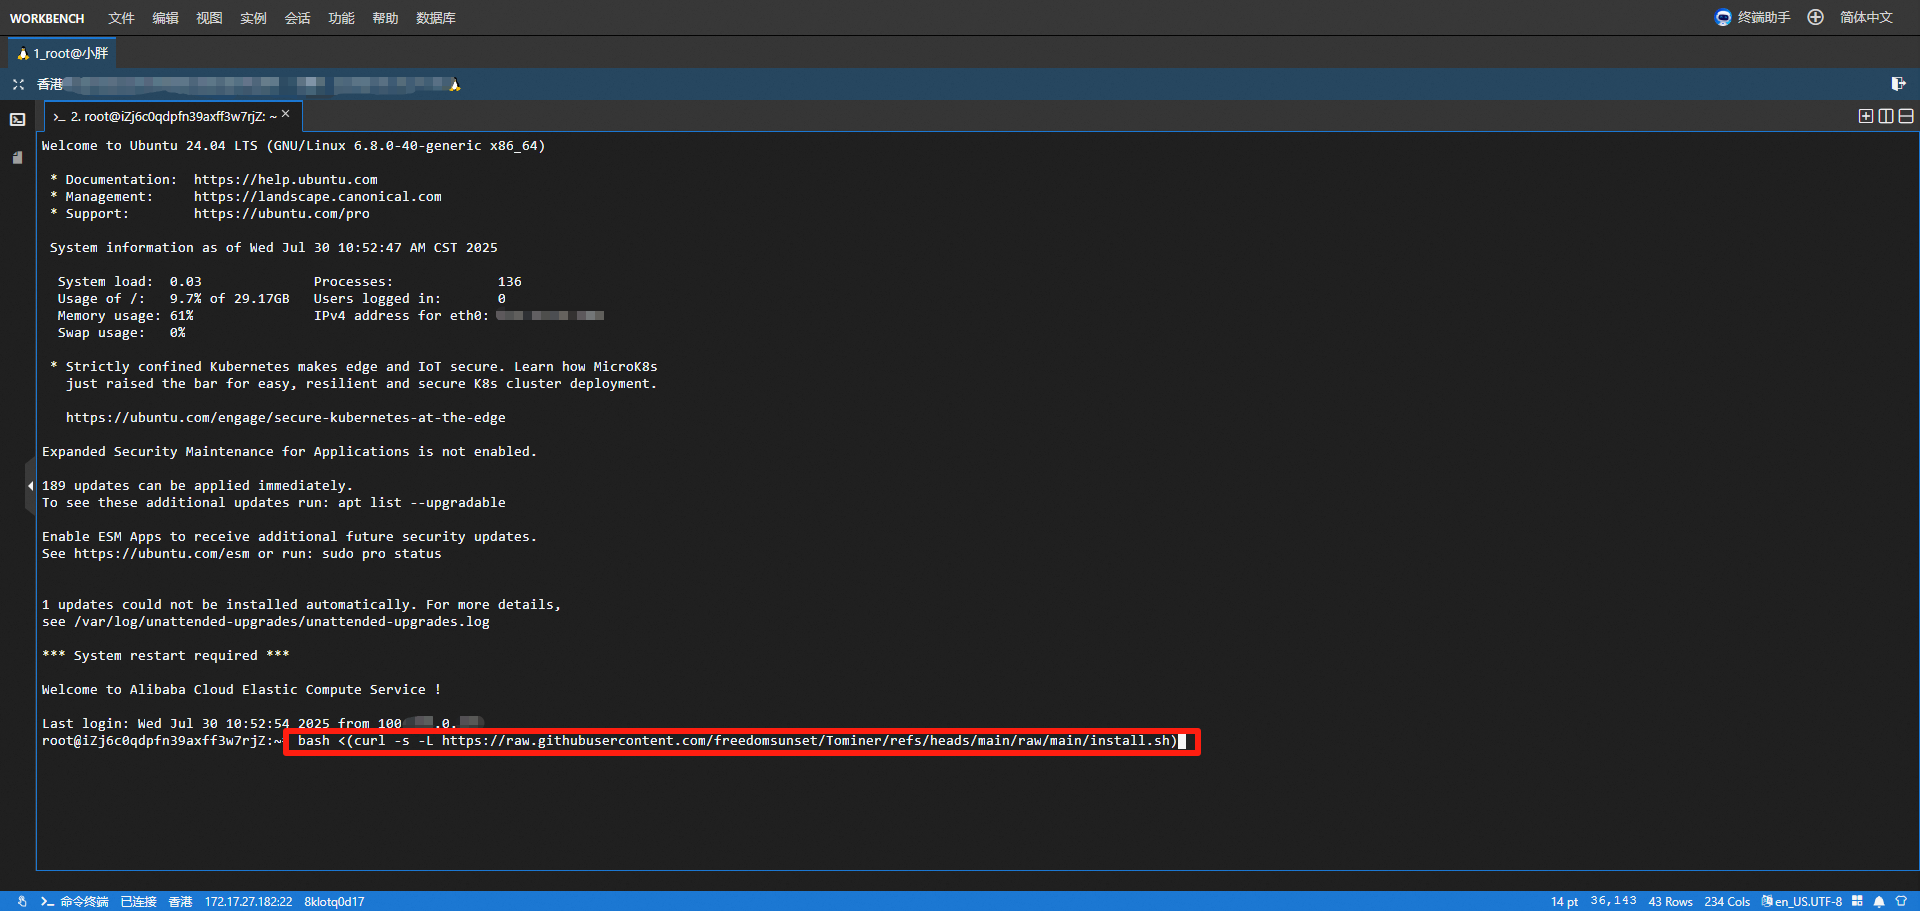
Program Installation Completion Prompt Interface
After installation, the following image will appear. Please open the server management background through a browser to configure the relay server.
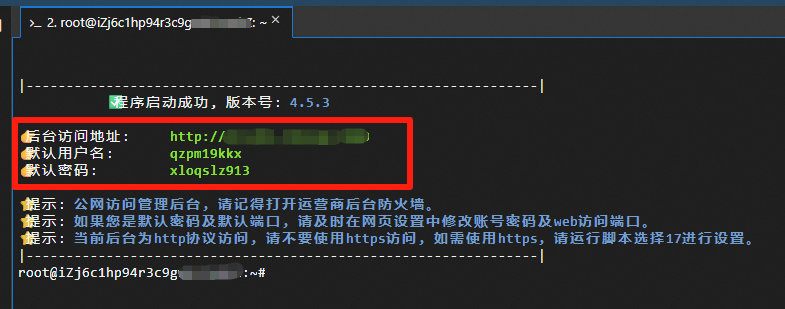
Access Page
2. Relay Server Configuration
2.1 Initial Login and Security Settings
- Log in with the default account and password: qzpm19kkx / xloqslz913
- Immediately modify the secure access address after login (you can set it freely with English letters or numbers)
- Modify the default account password to improve security
2.2 Basic Configuration
Select the corresponding language, select the currency to be relayed, and click to create a port.
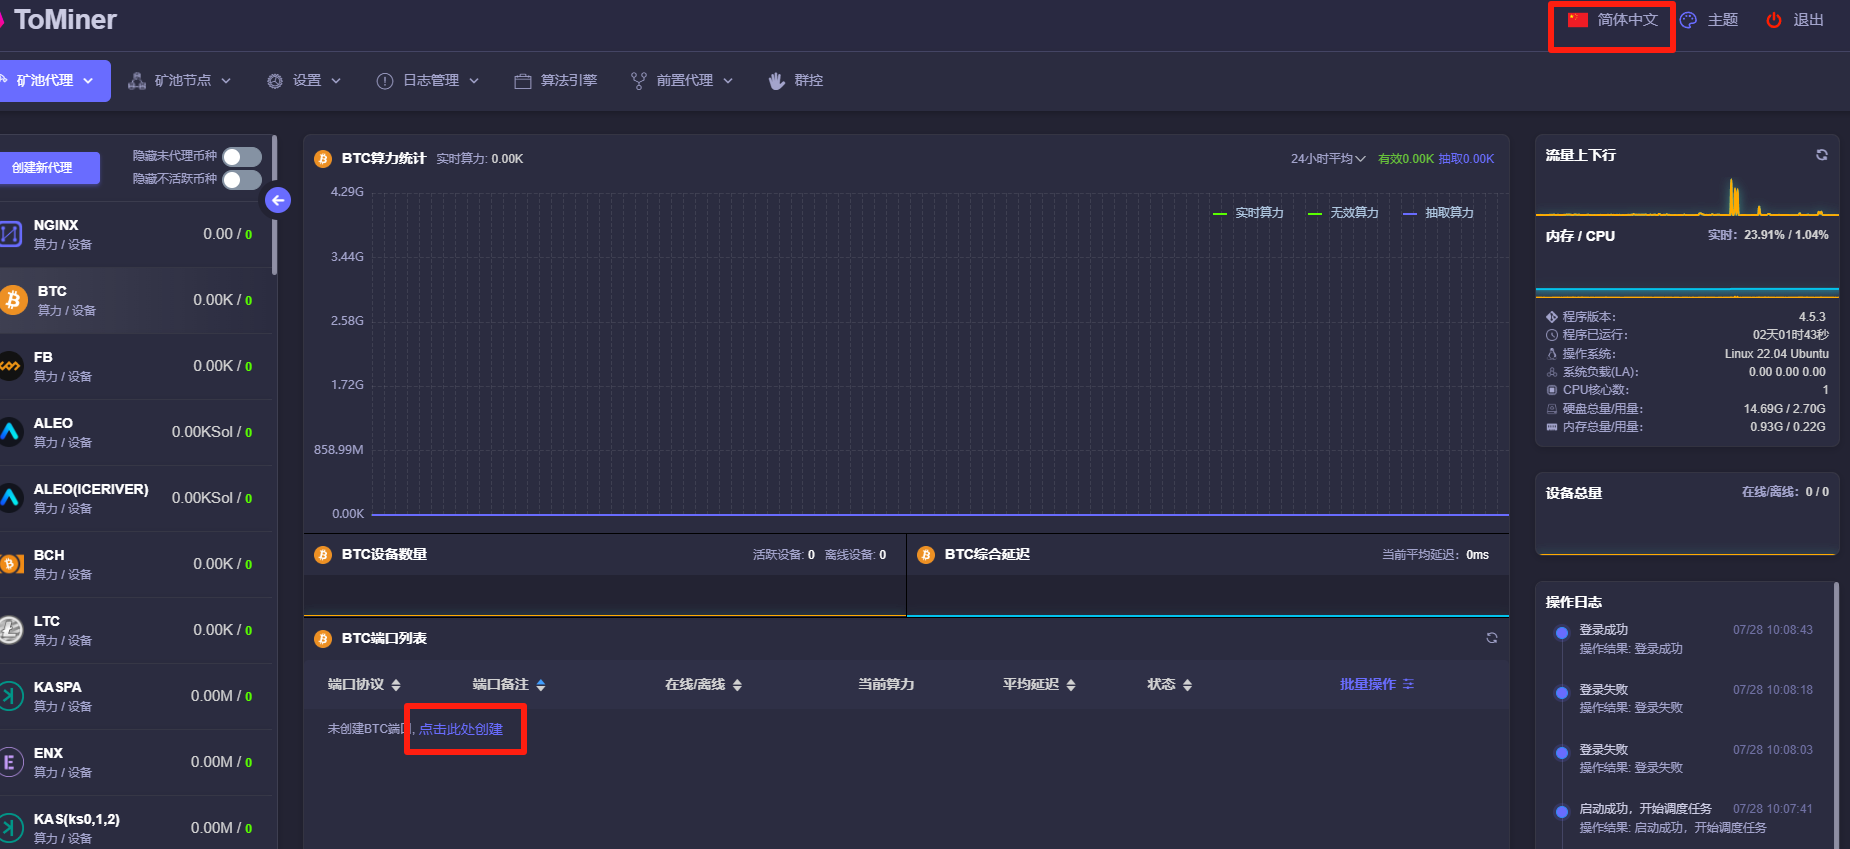
Relay Server Management Backend Interface
2.3 Mining Pool Configuration
If you need to relay to a mining pool, you can add the mining pool address in the quick selection, or fill in the official mining pool address yourself. Set the port number, which can be any open port from 23 to 65535, and select the appropriate protocol for yourself.
(1)TCP/TLS dual protocols, which can realize direct connection of mining machines.
This protocol can realize direct connection of mining machines. Fill in the server IP + port in the mining pool settings of the mining machine, for example:
Note: The colon must be an English input method colon, not a Chinese input method colon
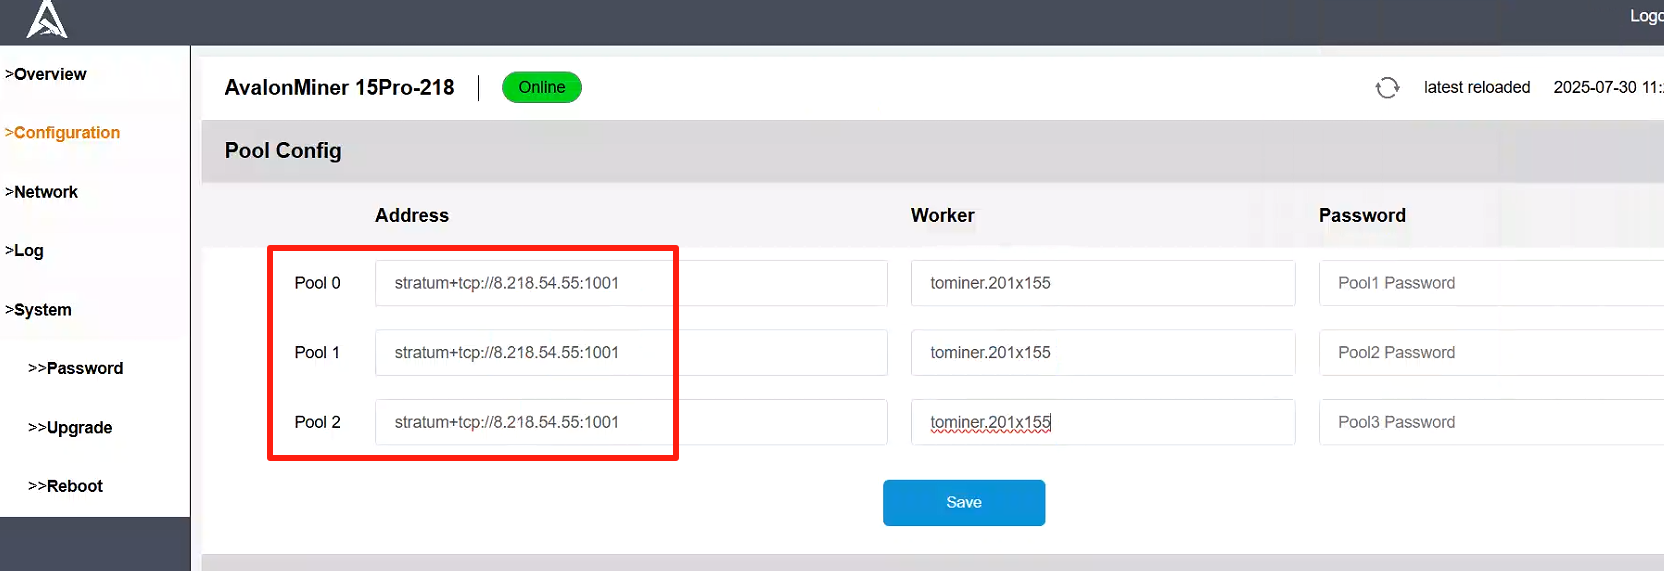
Mining Machine Mining Pool Configuration Interface
Note the format of the proxy mining pool address, do not choose the wrong one:
- SSL address prefix: stratum+ssl://, select SSL for the mining pool protocol
- TCP address prefix: stratum+tcp://, select TCP for the mining pool protocol
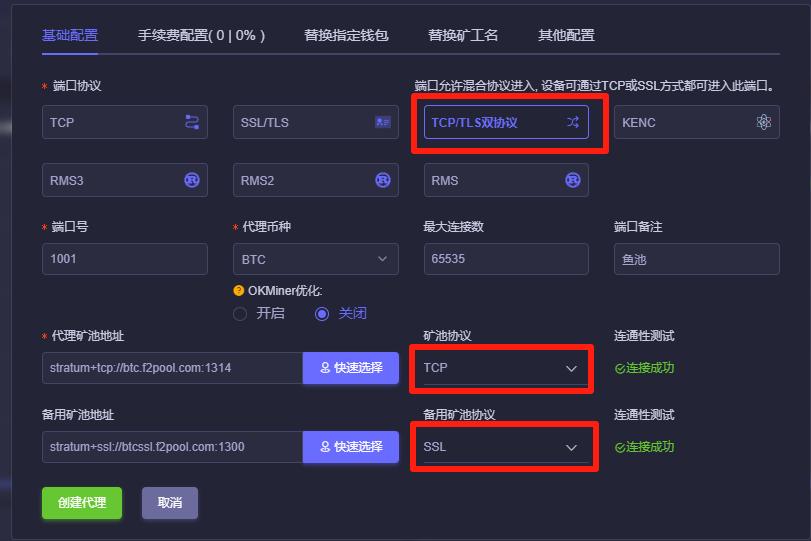
Mining Pool Protocol Configuration Interface
(2)RMS2, RMS3 protocols
For users who need data encryption and compression, please use RMS2 or RMS3 protocols. Just change the port protocol to RMS2 or RMS3, install the corresponding RMS software locally in the mining farm, and fill in the push address to complete the deployment of the local RMS software:
- RMS2: Mainly for users with data encryption needs
- RMS3: For users who need data compression, it can realize 10,000 devices with only one 4G card
Note: Port numbers cannot be reused
3. RMS Configuration
3.1 Obtain RMS Push Address
In the server management background, find the front-end proxy, click RMS, and the yellow font part on the page is the RMS push address.
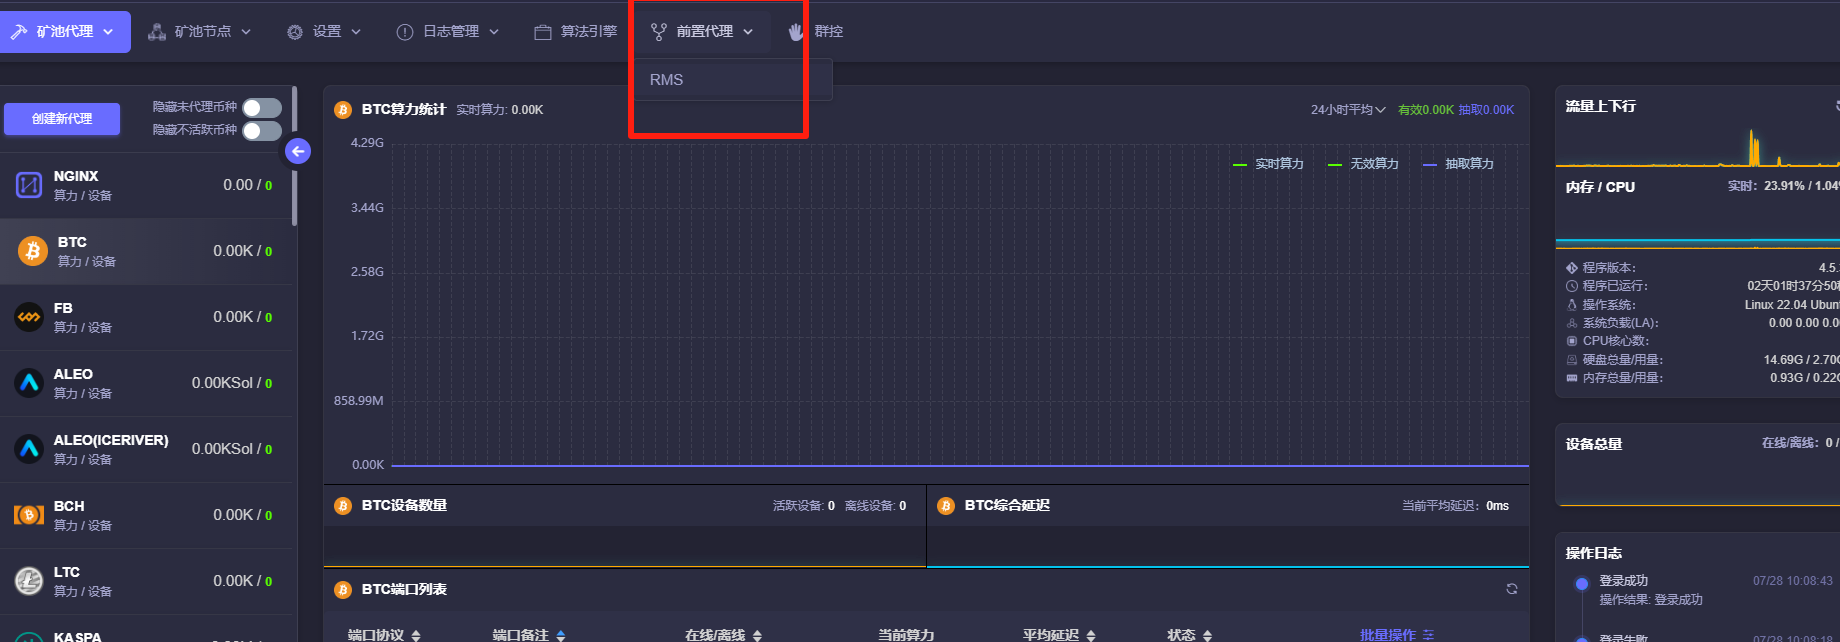
RMS Push Address View Interface
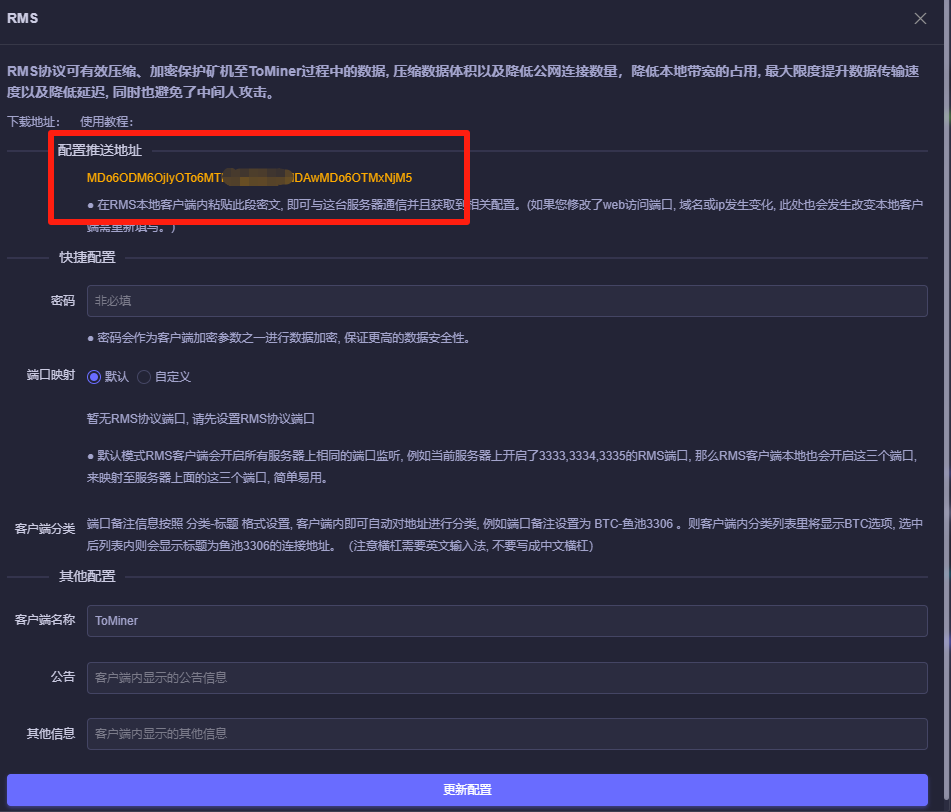
RMS Push Address View Interface
3.2 Local RMS Deployment
-
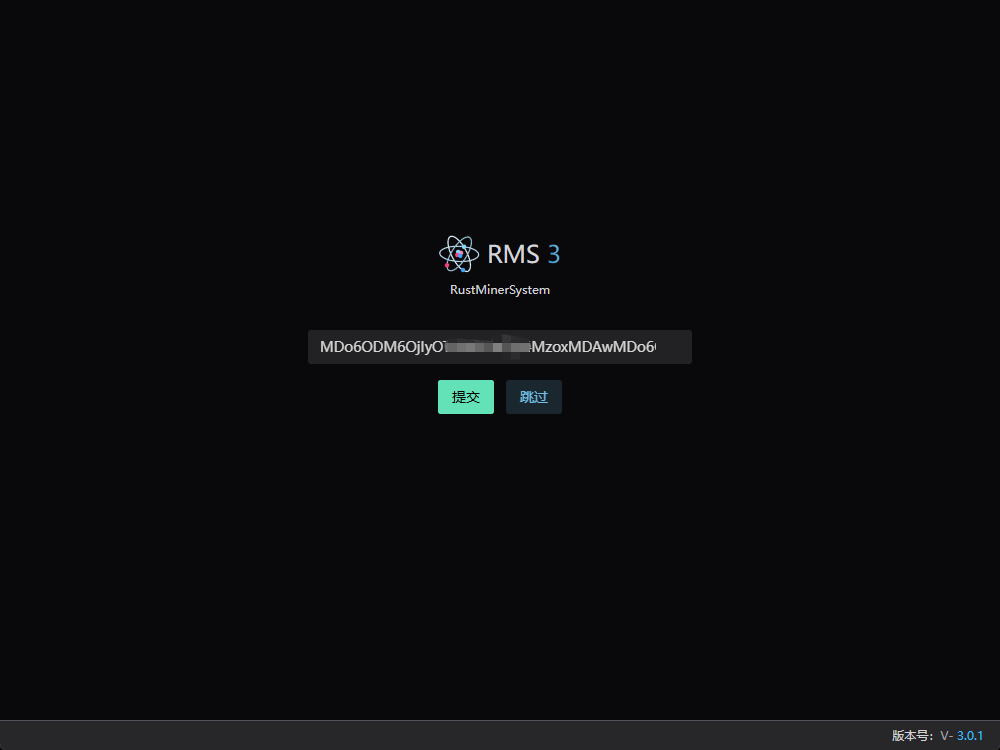
1.Download the RMS software from the Tominer official website. It should be noted that if the port protocol established in the relay server is RMS2, the local deployment must install the RMS2 software; if the port protocol established in the relay server is RMS3, the local deployment must install the RMS3 software.
- Relay server port protocol is RMS2 → install RMS2 software
- Relay server port protocol is RMS3 → install RMS3 software
Note: Do not use them interchangeably, otherwise it will be invalid
-
If a white screen appears and displays abnormally, you need to install the runtime environment:
In the Tominer official website navigation bar Help-Tool Download, download and install the MicrosoftEdgeWebview2Setup.exe file
-
3. Fill in the RMS push address obtained from the server into the RMS software. So far, the local RMS deployment is completed. The mining machine only needs to fill in the corresponding mining address according to the local RMS prompt to realize data encryption and compression functions.
The mining machine only needs to fill in the corresponding mining address according to the local RMS prompt.
Important note: The RMS software must not be closed. It is recommended to set a fixed IP for the computer where RMS is deployed, otherwise the IP change after an unexpected power failure and restart will cause the mining machine to fail to connect.
3.3 Mining Machine Configuration
Fill in the mining machine connection address prompted by RMS in the mining pool configuration of the mining machine.
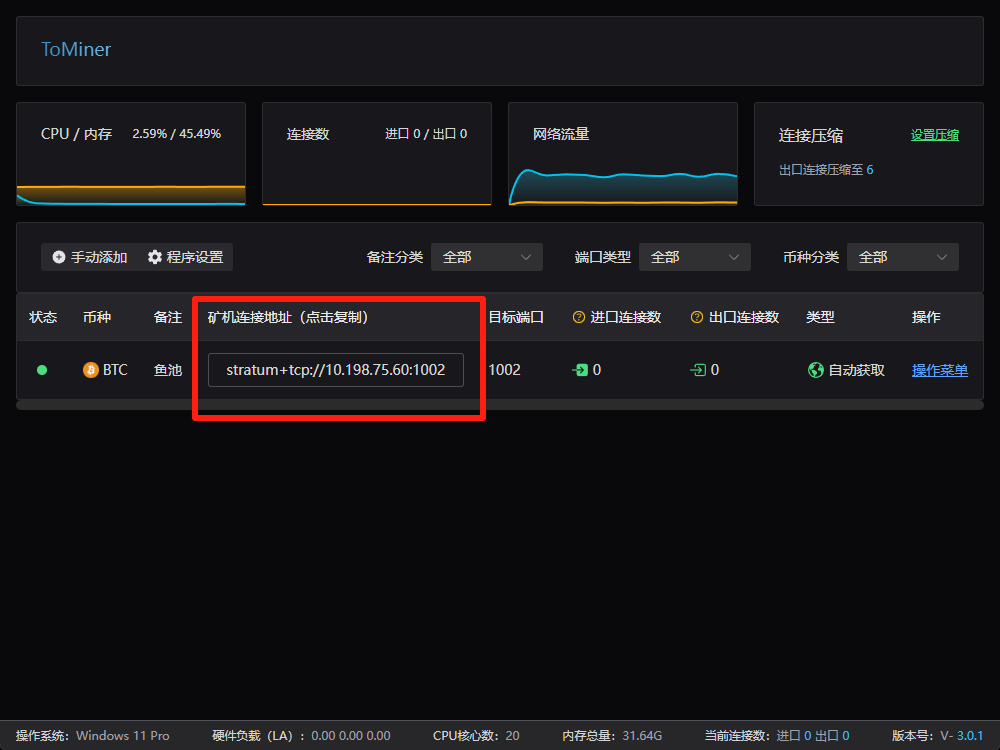
Mining Machine RMS Connection Configuration
4. Fee Configuration
The following are the detailed steps for fee configuration:
-
Open the management background, find the port that needs to charge fees (for example, machines in the Bitcoin 1001 port need to charge 2% fee)
-
Click "Operation Menu" next to the port, then click "Hot Update Fee Configuration"
-
Fill in the relevant configuration information:
- Wallet address or sub-account: Fill in your own miner name (not the miner name of the machine being charged)
- Fee mining pool address: Fill in the target mining pool address you want to charge to
- Fee name: Can be filled in arbitrarily, must use English or numbers
- Fee ratio (%): Set the fee ratio (e.g., 2%)
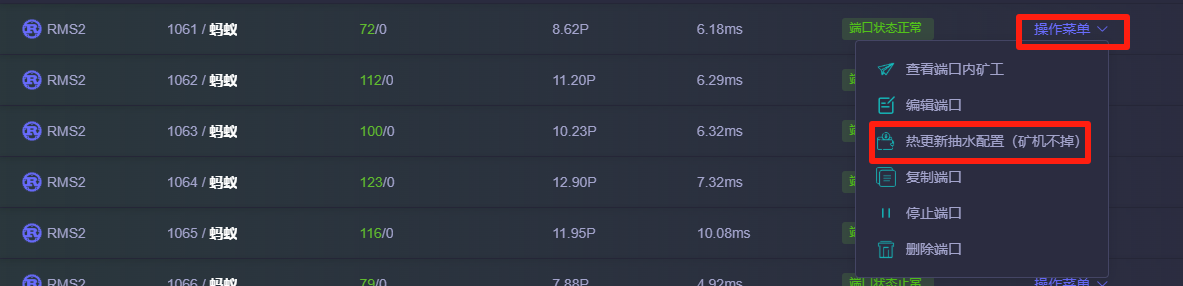
Port Operation Menu
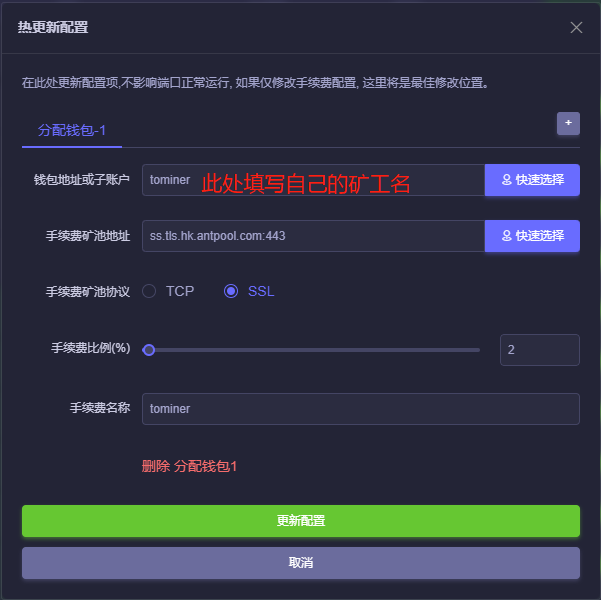
Hot Update Fee Configuration Interface